Dogs & Pigs – Game Tips & Strategies
Dogs & Pigs Tips & Strategies
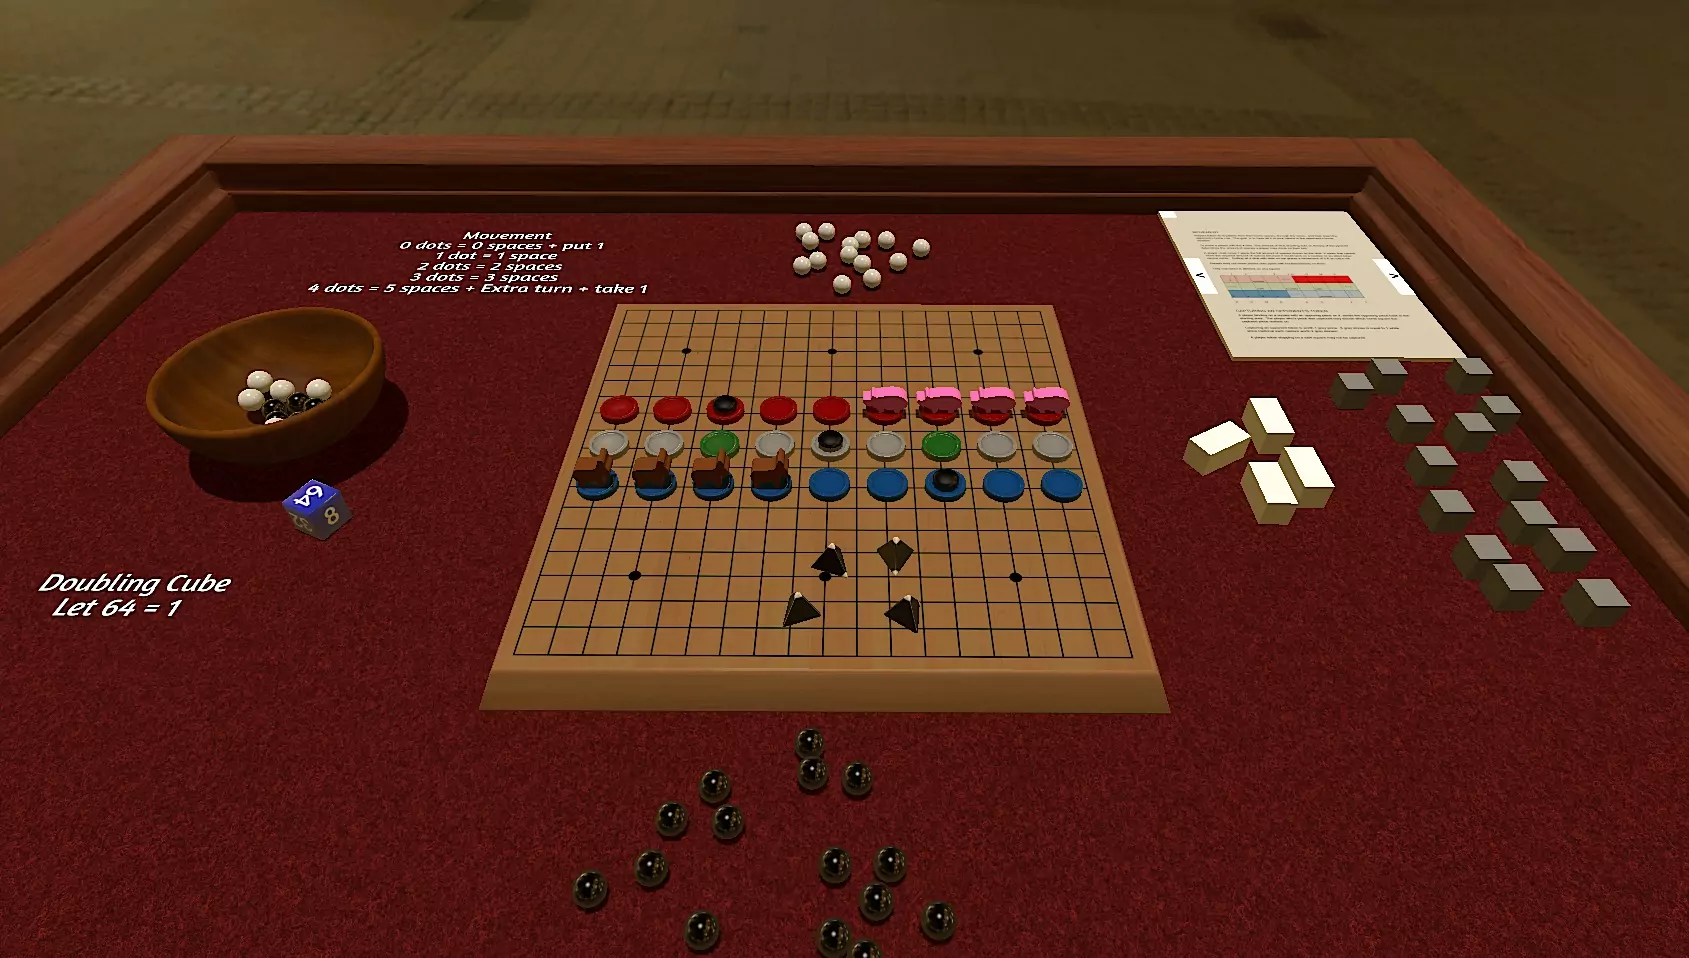
First the math. Odds of rolling the following outcomes on the 4 dice:
0 Dots (1) – 6.25%
1 Dot (4) – 25%
2 Dots (6) – 37.5%
3 Dots (4) – 25%
4 Dots (1) – 6.25%
(x) donates number of times in 16 outcomes the roll appears
Dogs & Pigs Rules – Dogs & Pigs Rules – The 5000 Year Old Mystery Game
The Design Story – Solving a 5000 Year Old Mystery – Designing Dogs & Pigs
Play It On Steam TableTop Simulator – Dogs & Pigs – The 5000 Year Old Mystery Game
Thine Who Holds The Home Row Holds The Crown
Dogs & Pigs is like playing Backgammon in a closet. It is imperative to get your tokens on the offensive. The key spaces on the board are the last two spaces on the home row (between the home row boulder and the beginning of the center row).
The Gold Stars Indicate The Two Critical Board Spaces In Each Home Row
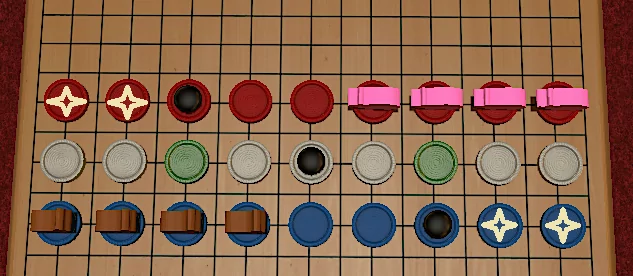
Defending the home row – DO NOT let your opponent those last two spaces in your home row. If you do you can get trapped in your home row and slowly, but surely, pummeled to defeat in a humiliating display of rolls that leave you unable to move while your opponent circles the board and then slaughters you roll by roll until death. This, in general, is bad. And it will be extremely costly unless you can stomach the word “concede” and take the loss while the cost is low.
Attacking the home row – The goal of any player is to get their token onto the last two spaces of an opponent’s home row. If accomplished it effectively besieges the opponent where the only way out is a roll of 4 dots(6.25%). Even then, they have to roll it multiple times to have any chance of surviving, let alone winning.
And while bottling up your opponent as you romp around the board like a viking on holiday sounds good, the best part comes when you batter your enemy with capture, after capture, after capture, and see all their coins going into the bowl as you turn the doubling cube again and again.
The 4 Spaces Away Strategy
- Being 4 spaces away from an opponent is a floating safe spot. There is no way to roll a 4. If 4 dots are rolled, the player moves 5 spaces. Thus, being 1,2,3 or 5 spaces from an opponent means capture is possible. Being 4 spaces away is ideal.
- Being 4 spaces away from your own tokens is also preferable. You cannot be blocked by your own token if it is 4 spaces away.
- Just like being 4 spaces away can be good, being 4 spaces away can also be bad. Being 4 spaces away from a safe space means landing there is impossible in one roll.
Fortune Favors The Bold
- Given the option of sitting back and moving all tokens along the home row, or moving one or two tokens out quickly to try to gain control of the center row and press an attack, you should almost always choose the latter. If you have to play defense because of early bad rolls (or opponent good ones), make sure the defense protects the beginning of the center row and the two key spaces on the home row.
- The game always starts out with several rounds of positioning, but at some point, someone has to make the first attack move and cross over the center boulder. This should always be you.
- The best place to be vs an enemy is 1 space away. It is only a 25% chance to roll a 1, so you will survive 75% of the time. When you do, you now have a 25% chance of a capture(assuming the opponent is not on a safe spot), and a 68.75% chance of getting past.
- Stay out of the range of 2 or more opponents unless one or more is 4 or 5 spaces away. You do not want to be 1 or 2, 2 or 3, or 1 or 3 spaces away from 2 opponents. Capture will happen 50-62.5% of the time.
The Supported Attack & Playing Chicken
- Try to have a second token watching the back of the attacking token. In other words, try to have a second token within 1-3 spaces of where the attacking token will be. 3 spaces from the attacking token is ideal if the attacking token tucked in to the 1 space from the opponent spot. Now the backup token is 4 spaces from the opponent meaning it is safe from capture. If an opponent gets lucky and rolls a 1 to capture your attacking pawn, the backup pawn is now 3 spaces from the opponent. Thus you now have the same 25% chance of capturing the just triumphant enemy piece.
- If you fail to roll a 3 on the subsequent turn(by which you would capture the enemy), you can now play a game of chicken with your opponent. By not moving the token that is 3 away from the enemy, you will force your enemy to make a decision the next turn if they do not roll a 3. Do they move closer or do they stay in place? No matter what they do(save rolling a 5 and leaping out of harm, or finding a safe space), the enemy will still be in range for a capture on your next roll.
Wagering
- If utilizing the wagering aspect of the game, whether to wager pennies or keep score(the person that runs out of marbles/units/coins loses), use the doubling cube to pressure an opponent to concede.
- If using the wagering aspect, It is better to go out attacking and concede early, limiting losses, than to get into a losing, pinned-in position. If you get pinned in, it is inevitable that you will suffer many captures as you are slowly beaten down and pushed back. Each capture is costing a unit multiplied by the doubling cube. If your enemy has turned the cube to 4 or 8, a capture is costing 4 or 8 units, not just 1.
- Like any good general or chess player, recognizing defeat and conceding is not unsporting, it is the gentleman thing to do. It can take 5 to 10 minutes of rolling to pound an enemy into complete submission and win by moving all your tokens into their home spaces. All the while, you both know that there is no hope of turning the game. It is just a matter of time and mathematics. It is at his point that concession allows for more play time, rather than less. Concessions can allow for 2 games to played in the same time as one drawn out to the very last roll.
- This is the reason the wagering aspect is actually important to game play. If you were really wagering on the game, you would concede to limit financial losses. When the gambling aspect is removed(or scorekeeping via wagered units is removed), the enemy has no real penalty for not conceding. Thus to truly enjoy the game, and put the pressure of a bigger loss on the board is a bigger loss to the wallet, it is preferable to play the game with the wagering aspect in tact. You don’t have to wager real money, but start with 100 units(marbles, chips, etc) and the game ends when someone goes broke.
While Dogs & Pigs is an inherently simple game, it has a surprising amount of strategy. Much like Backgammon, the tactic of besieging an opponent and sealing them in their own home area is the tactic that leads to almost certain victory.
Similarly, in both Backgammon and Dogs & Pigs, lucky rolls turn games. Many times the first 5 rolled in the game sets the tone of who will be the attacker and who is “defending”. A second rolled 5 can sometimes be the tipping point, especially if it involves a lucky early capture, thereby allowing the attacker to gain the home row foothold in the enemy’s home row.
If you find yourself in a defensive role, you still must think aggressively and attack to gain territory. Take the risk of being in the line of fire from 2 opponents 1 & 3 squares away. You have a 50/50 shot of surviving and then being in a great counter attacking position. If you start thinking too defensively, you will get pinned back and then overrun.
If you end up mastering the strategy of the game, try using the random boulder placement option to spice things up and change where the key spaces on the board will be. It will most likely require a slightly different strategy to bottle up an opponent and master the game again.
Most of all, have fun playing Dogs & Pigs. Happy Gaming!